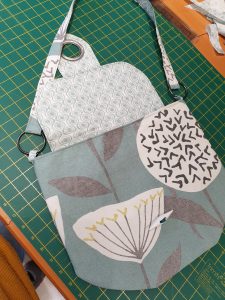
I’ve been needing a new handbag for a while, and that’s why I’ve decided to make an upcycled curtain handbag. I tend to find a bag I love then use it to death. While on a shopping trip to Dunelm, I came across a bin of material. It seems that, once they have finished displaying the curtains, they put the single curtains for sale, for £5 each, in this bin. Well, I couldn’t resist the chance to nab some cheap material and use up something that may end up being thrown away. I had a rummage and found this:
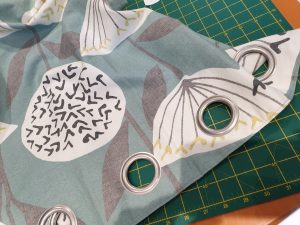
It was a beautiful print with a nice lining and the silver tabs were just asking to be incorporated into the final design. I’m still very new to sewing so I made my design very simple. I used baking paper to draw out a rectangle shape about the size that I wanted the finished bag to be (plus a 1/4 inch seem allowance) and used this as my template to cut out 4 pieces of material. I curved the bottom of the rectangles using a french curve to give the bottom of the bag a bit of shape.
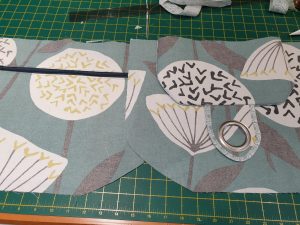
I used another piece of baking paper to make the flap, I estimated the size by placing it against the cut out fabric and considering the seem allowances on the bag and the flap. It was all a bit dip dash but the fabric was so cheap that I thought it was worth just having a go.
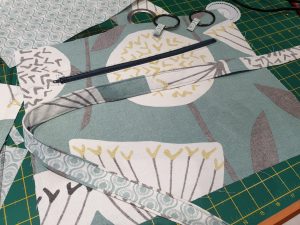
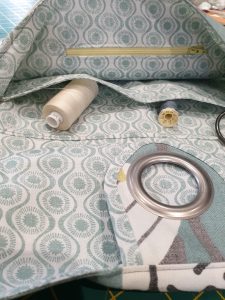
Now, what did I want from my bag? I wanted a zip on the back on the outside to just drop things into and I also wanted some pockets high up on the inside for my car keys. I also wanted an inside zip pocket to keep personal items in. So, before I could assemble the bag I had to consider these and add them onto the bag. I started with the outside zipper, which you can see on the picture above. I reinforced the pocket material with some iron on interfacing to make the pocket more sturdy then followed this video on YouTube to remind me of how to add a zipper pocket. My sewing isn’t great but, you know what, it didn’t matter because it’s for me and I used a neutral thread colour to help to disguise any small errors.
I took the rings from an old handbag and sewed little strips of the lining material to them to attach the straps to the handbag. I guessed the length of the strap by draping a tape measure over my shoulder to where I’d like the bag to hang and adding a couple of inches for folding around the rings. I doubled the width of the material and sewed the materials right sides together length wise. I then had to turn it the right way in which was really difficult. I used a safety pin to feed it through itself. To be honest, I wouldn’t make a bag strap this way again. It’s much easier to use one piece of material that you have folded in on itself to hide any raw edges and then just top stitch. You can always add pretty details as aplique later. Debbie Shaw has some great you tube vids that will show you how to do this sort of thing.
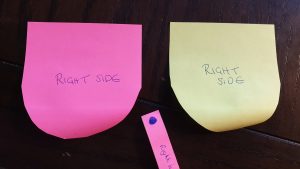
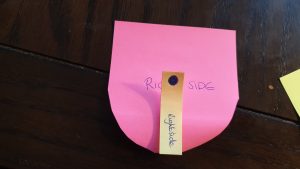
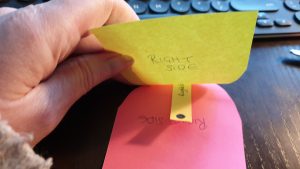
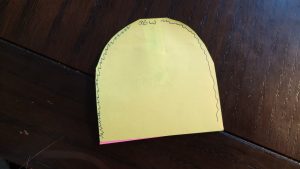
The tab which I attached to the flap to slip the button through, was super tricky. I decided that adding the ring on the tab would be a cool nod to it’s curtain heritage, but as there were raw edges I would have to use bias binding to prevent fraying. Ambitious me decided to have a go at making the binding out of some of the curtain lining material. I watched this YouTube video by danamadeit (I really love her tutorials) to learn how. I don’t have the bias tape maker but I managed ok with just an iron and some careful folding. The flap was constructed by placing the tab piece face down between the lining and the outer flap pieces (all right sides together) then sewing around the edges. leaving the back edge unsewn so as to leave a place to turn it all the right way out. I’ve done a little post it diagram below:
I took the two pieces of lining fabric and added a zipper pocket to the one and a couple of small pockets to the other. Then I was ready to start assembling the bag. I left the strap off to add last but remembered to place the rings with their little strips of material within the bag. I sewed the flap to the back of the bag before assembling the rest so that it wouldn’t slip about. Then I placed all of the right sides together and sewed around the bag. Again check out Debbie Shaw’s handbags on how to do this.
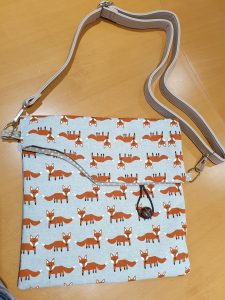
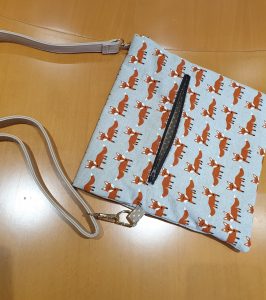
Finally, it was time to turn it all the right way out and see if my addhock creation had worked. And low and behold:
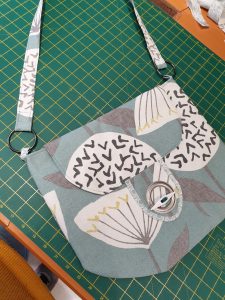
I have a brand new summer handbag. An original design, with all of the bits that I want from a bag.
Plenty of pockets, beautiful lining and all for less than £10! I’d definitely have another go. In fact I have my eye on some blue tweed style curtains that are up on display in Dunelm right now. Hopefully I’ll bag them and make a beautiful upcycled winter handbag.
I am really an amateur sewer my Nan gave me her old 1970s Frister and Rossmann which, with the help of youtube and a programme called Craft Daily, I picked up a few skills. My point is, don’t be afraid to have a go. I made a little reversible handbag for my first project (I’ve made a few of them sinc as birthday presents for little girls) they are very simple to make and the pattern is very forgiving.
We all tend to just go out and buy our clothing, bedding and bags these days. Which is partly because we all have such busy lives, which is a shame, but I also think it’s because we’ve started to believe that these things are beyond our skill set. They are absolutely not and remember that every art technique and craft, was invented by some amateur, messing around trying to create something wonderful. So if you’ve always thought about trying but thought that you may not be good enough, remember that and remember that even the very best and highest paid artists feel just the same. We all feel as though we are winging it at times. Buy some cheap material. I used fat quarters for the reversible bags and have a go.
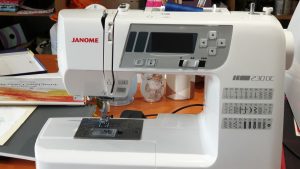
Nan’s Frister and Rossman has just recently been upgraded to this wonderful Janome 230DC I knew from her website that Tilly and the Buttons uses a Janome model and this one was in my budget. I’ve used it to hem my boy’s school trousers (and they haven’t fallen down yet!) and I’ve made my hand bag and a lovely handbag for my eldest daughter (see below). I’ve also made some beautiful little heart lavender bags for my sister to sell to raise money for her animal rescue. I’m having so much fun and becoming a more confident sewer with every project.
For more about this website check out homespundreamer.com
Recent Comments